Things to remember when constructing my final model:
- start cuts at a minimum and work my way out
- remember to clearly analyse which angle is preventing perfect assembly before cutting anything
- consider where tapers will effect other angles.
- always snap blades off to prevent cutting too deep into cardboard.
and...
only cut the cardboard and not your finger!
Monday, May 25, 2009
Xanita 1:1 mock up
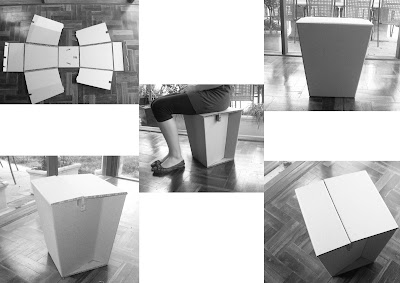
Here are some images of my Xanita mock up. This was alot more tedious than expected, but i learnt several lessons for my final 1:1.
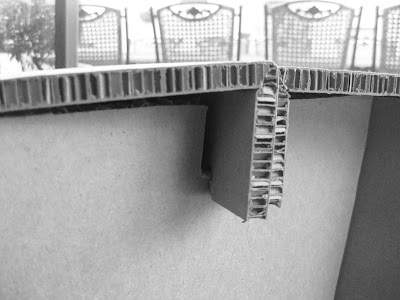
With the final plains folding on top of the whole chair and slotting in to hold the whole thing together, it is important they are the right length....obviously didn't happen here as they are not lying flat upon the supporting cardboard. Half a centimetre of each side would have cured this problem.
 While cutting the chair I came to conclusions about which angles were preventing it from sitting accurately and sometimes drew the wrong conclusions, this would be an example: I thought the angle on the bottom of this plain was not large enough when in fact it was one relating to the taper of my chair. As a result, there is a gap...noooooo
 Below is a perfect example of something that was disregarded all together. As the other side of this plain is tapered, this end also tapers..derrr. The end of this flap also needs to be cut on an angle as it meets an angled surface.
Also note the gaffa tape down the side..wooops, cut too deep.

With the final plains folding on top of the whole chair and slotting in to hold the whole thing together, it is important they are the right length....obviously didn't happen here as they are not lying flat upon the supporting cardboard. Half a centimetre of each side would have cured this problem.
 While cutting the chair I came to conclusions about which angles were preventing it from sitting accurately and sometimes drew the wrong conclusions, this would be an example: I thought the angle on the bottom of this plain was not large enough when in fact it was one relating to the taper of my chair. As a result, there is a gap...noooooo
 Below is a perfect example of something that was disregarded all together. As the other side of this plain is tapered, this end also tapers..derrr. The end of this flap also needs to be cut on an angle as it meets an angled surface.
 Also note the gaffa tape down the side..wooops, cut too deep.

Monday, May 18, 2009
Flat pack
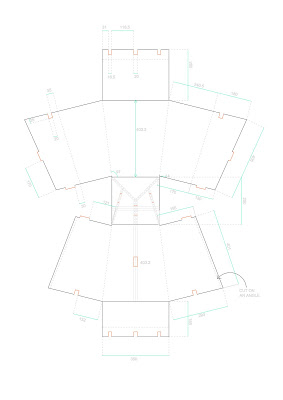 Here is my final flat pack before constructing the chair out of xanita....let's hope it works!
Measurements and the lengths of card required will obviously always change with each attempt as each fold will require a certain amount of extra length. Because of this, it is vital to not over cut any lengths and to start small and work my way up.
Angle testing
Solidworks
Finding correct angles
Tuesday, May 5, 2009
Final Design | 1:1 mock up
This was my first attempt of a 1:1 mock up using three layers of traditional corrigated cardboard.
This design has proven strong enough to hold the required weight but lacks in a neat execution. For further development i need to focus on obtaining the correct angles for the chair to work aesthetically aswell as functionally.
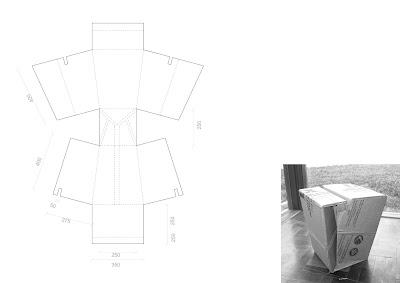
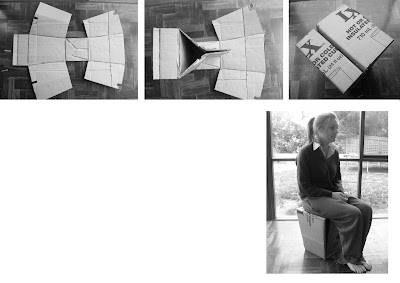
This design has proven strong enough to hold the required weight but lacks in a neat execution. For further development i need to focus on obtaining the correct angles for the chair to work aesthetically aswell as functionally.


Sketches - Developing final design
Through these sketches I explored the idea of a tapered triangle stool. I was then adding angles within that form but struggled to find a way for it to be sturdy/intelock.
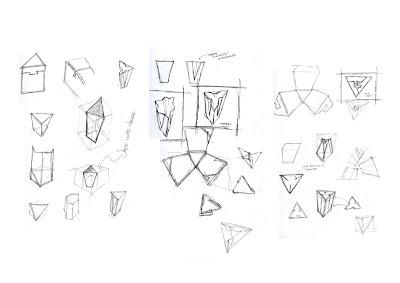 This lead to me to simplify it down to a tapered cube. With elements from last years examples that I liked, I formed a first draft of my final design.
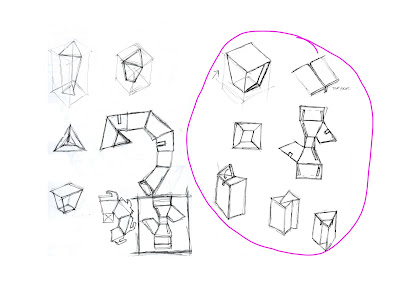
 This lead to me to simplify it down to a tapered cube. With elements from last years examples that I liked, I formed a first draft of my final design.
Subscribe to:
Comments (Atom)


